Intro
In this example, I will show you the steps, and below you will see the link to download the final script:
- Make the input pretty, so it blends in with the rest of the elements
- Assess and restrict the upload based on the file types and maximum size
- Display the error messages
- Drag & drop a file inside a specific upload zone that is connected with the pretty input
- Upload the file with AJAX
- Download the script (this includes a basic server-side example)
NOTE Please note that the downloadable code from this tutorial is not intended for production/live applications, it needs extra code for security (so that the restriction will not be bypassed on the client side) and a full server-side validation (the code is only intended as a starting guide). You will need to include a jQuery library.
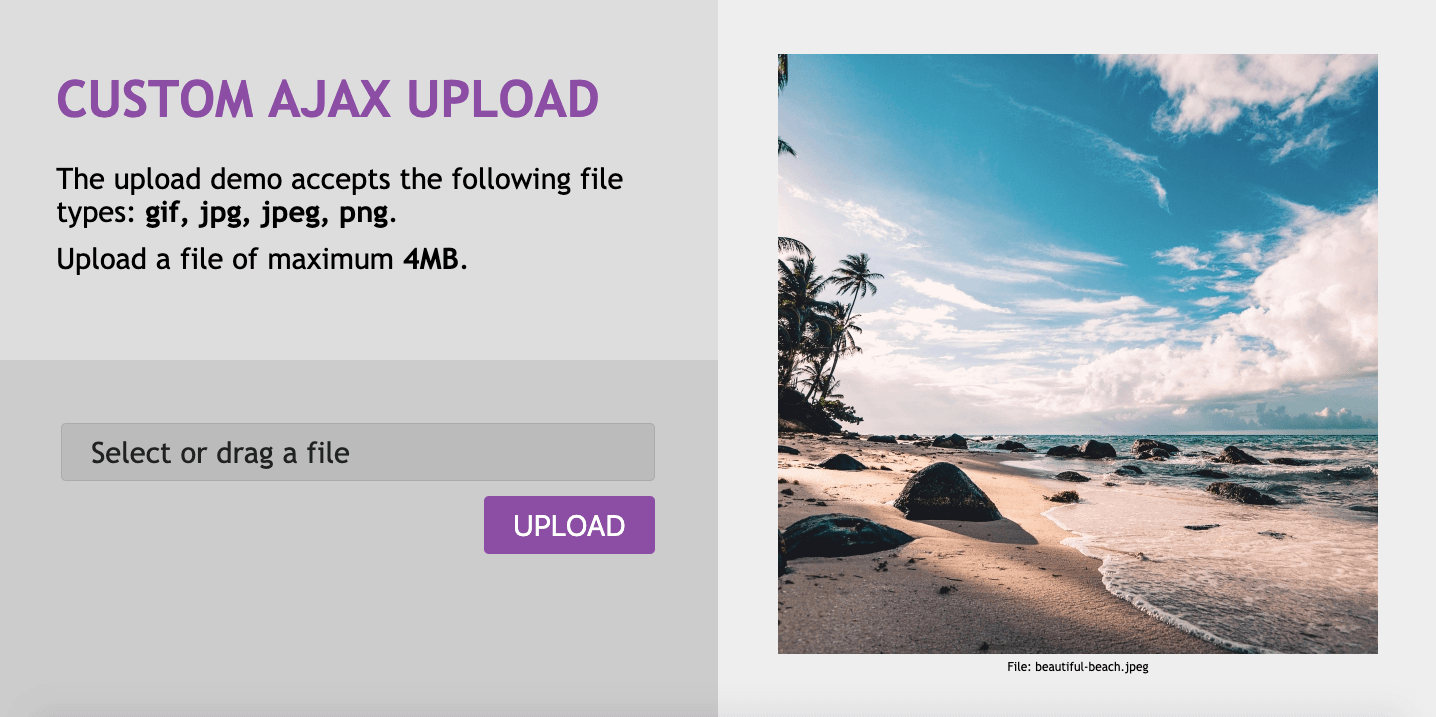
Styling the File Input so it Looks Pretty
Most of the time, styling the file input to look the same in all the browsers is one of the first things I have to do, because the upload is always integrated into a beautiful form, with its own style, and the file upload should look similar.
To achieve this, I create a simple label element (and style that instead), making sure that the client-side script will handle the update of the text visible on the label, according to the situation.
For example, this is the markup I use:
<!-- This is the actual input, but I do not want to show it on the page -->
<input type="file" name="image-custom" id="image-custom">

<!-- This is the visible element, which is easier to customize -->
<label for="image-custom" id="image-custom-label">Select or drag a file</label>
In the styles file I make the file input hidden like this:
#image-custom {
	height: 0.1px;          // Make the input height very small.
	position: absolute;     // Set the position to absolute, so that it does not take space.
	opacity: 0;             // We don't need to see the element on the page.
	overflow: hidden;       // This combined with the width and height will make the element small.
	width: 0.1px;           // Make the input width very small.
	z-index: -1;            // Attempt to move it under the rest of the elements.
}
Then add the styles for the label, which is the visible element that will indicate a targeted file or a specific text, depending on the context:
#image-custom-label {
	background-color: #DDD; // Set the background color.
	border: 1px solid #AAA; // Set the border and its color.
	border-radius: 5px;     // Set the rounded corners.
	cursor: pointer;        // Show the pointer when interacting with the element.
	display: block;         // Make it a block element.
}
Assess the File Type and Size
When the file is selected, I can assess the file size and the type. First, I will specify the file attributes used for the restriction, like this:
<input type="file" name="image-custom" id="image-custom" data-extension="jpg,jpeg,gif,png" data-size="4MB">Please note the two new attributes I added for the file input, the attribute data-extension is specifying the allowed extensions (use comma as separator, if you do not want any restriction just put *) and the attribute data-size is specifying a human-readable maximum size (no space between the size and the unit). I will use these two attributes in the client-side script, to check against the selected file attributes.
In my client-side script, I convert the readable maximum size into the total bytes, so that I can easily compare this value with the selected file size:
...
// Compute one time the restriction (see below the sizeConvertor).
this.input.data('filesize', this.sizeConvertor(this.input.data('size')));

...
if (size.endsWith('MB')) {
	// Put this first, is the most common.
	return parseFloat(size) * 1024 * 1024;
} else if (size.endsWith('KB')) {
	return parseFloat(size) * 1024;
}
...
When a file is selected, I assess the size and the extension:
...
if (file) {
	this.label.html(file.name);
	if (file.size > this.input.data('filesize')) {
		console.log('Maximum allowed size is ' + this.input.data('size') + '.');
	}

	var extensions = this.input.data('extension');
	var allow = extensions.split(',');
	if (! allow.includes('*')) {
		var value = file.name.toLowerCase();
		var ext = value.split('.').pop();
		if (! allow.includes(ext)) {
			console.log('Allowed type: ' + extensions.replace(/,/g, ', ') + '.');
		} else {
			this.label.html(file.name);
		}
	}
}
...
Display the Error Messages
Instead of logging the errors, I keep these as custom attributes of the upload form, and in this way, I can check these from different sections of my code.
First, I will specify the attributes like this:
<form name="frm-custom" id="frm-custom" method="post" action="upload.php" enctype="multipart/form-data" data-size-error="" data-type-error="">In the script, I updated the two attributes with the error messages. When I need to assess if the form can be submitted, hence the file uploaded, I check the form error attributes and decide what to do next, for disable the upload button and display the error details:
...
var error = this.form.data('size-error') + this.form.data('type-error');
if (error) {
	return false;
} else {
	return true;
}
...
Drag & Drop the File
To enable the drag & drop of files for the custom upload, the script should listen for the specific events and update the input and the label with the expected file:
this.form.on('dragover dragenter', function(e) {
	e.preventDefault();
	self.source.addClass('file-dragged');
});

this.form.on('drop', function(e) {
	e.preventDefault();
	if (e.originalEvent.dataTransfer.files[0]) {
		...
	}
	self.source.removeClass('file-dragged');
});
Upload the File with AJAX
...
// Compute the data to be posted.
...
jQuery.ajax({
	type: 'POST',
	url: this.form.attr('action'),
	data: args,
	cache: false,
	contentType: false,
	processData: false,
	dataType: 'json',
}).done( function( response ) {
	// Add some code to output the server-side response.
}).fail( function( response ) {
	// Add some code to output an error message.
});
...
Download the Full Example
Here is the entire code, merged into a single file. It includes a small example of the server-side upload handler. You can download, install, and activate the plugin on your site, no need to make any extra settings.